The Ultimate Aussie Guide (Roll, Don’t Fold!)
When you’re in the midst of moving house, it’s easy to focus on the big furniture and the fragile kitchenware. But what about the items under your feet? Your rugs are often an afterthought, rolled up at the last minute and tossed into the moving truck. This is a recipe for disaster, leading to permanent creases, dirt, damage, and even mould.
A good rug is an investment that adds warmth and colour to your home. Protecting it during a move is simple, but it requires the right technique. This guide will show you the foolproof method for packing your rugs, ensuring they arrive at your new home as clean and pristine as the day you packed them.
The Pre-Pack Prep: What to Do Before You Roll
Don’t even think about rolling up a dirty rug. Taking a few preparatory steps will make all the difference.
1. Clean Your Rug Thoroughly
This is the most important step. Packing a dirty rug means you’re trapping dirt, dust, allergens, and potentially food crumbs deep within its fibres. This can attract pests and lead to bad odours.
- For most rugs: Give it a deep and thorough vacuum on both sides. If you have a carpet cleaner, now is the perfect time to use it.
- For delicate or expensive rugs (e.g., Persian, silk): Consider getting it professionally cleaned a week or two before your move.
- Spot clean any stains: Tackle any noticeable spills or stains before you pack.
2. Make Sure It’s Completely Dry
After cleaning, your rug must be 100% dry before you pack it. Rolling up a damp rug, even slightly, and wrapping it in plastic is a surefire way to create a mould and mildew nightmare. Let it air out completely for at least 24-48 hours.
3. Gather Your Packing Supplies
You won’t need much, but having the right materials is key.
- Heavy-duty plastic sheeting: You can get this from Bunnings. A plastic mattress bag or painter’s drop sheet works perfectly.
- Strong packing tape: To seal the plastic wrap.
- Rope or twine: To secure the rolled rug.
- A permanent marker: For labelling.
The Golden Rule of Packing Rugs: Roll, Never Fold!
If you remember only one thing from this guide, make it this. Folding a rug is the fastest way to damage it. Folding creates sharp, deep creases that can become permanent, cracking the rug’s backing and damaging the fibres.
Rolling, on the other hand, keeps the backing smooth and protects the pile, ensuring the rug lays flat and looks great in its new home.
Step-by-Step: How to Roll and Wrap Your Rug Like a Pro
This method works for everything from small hallway runners to large area rugs.
Step 1: Determine the Rolling Direction
Your rug has a “pile,” which is the direction the fibres naturally lay. You want to roll it with the pile to protect the fibres. To find the direction, run your hand across the surface. One way will feel smooth (with the pile), and the other will feel rough (against the pile). You want to roll it so the smooth direction is on the outside of the roll. Typically, this means rolling it with the top side facing inwards.
Step 2: Roll it Tightly and Evenly
Start at one end and begin rolling the rug as tightly as you can. A tight roll is more stable and easier to handle. For large area rugs, this is a two-person job. Have a mate help you keep the roll straight and tight as you go.
Step 3: Secure the Roll
Once the rug is completely rolled, secure it in the middle and at both ends with rope or twine. Tie it snugly, but not so tight that it dents the rug. Avoid wrapping packing tape directly around the rug itself, as the adhesive can pull out fibres and leave a sticky residue.
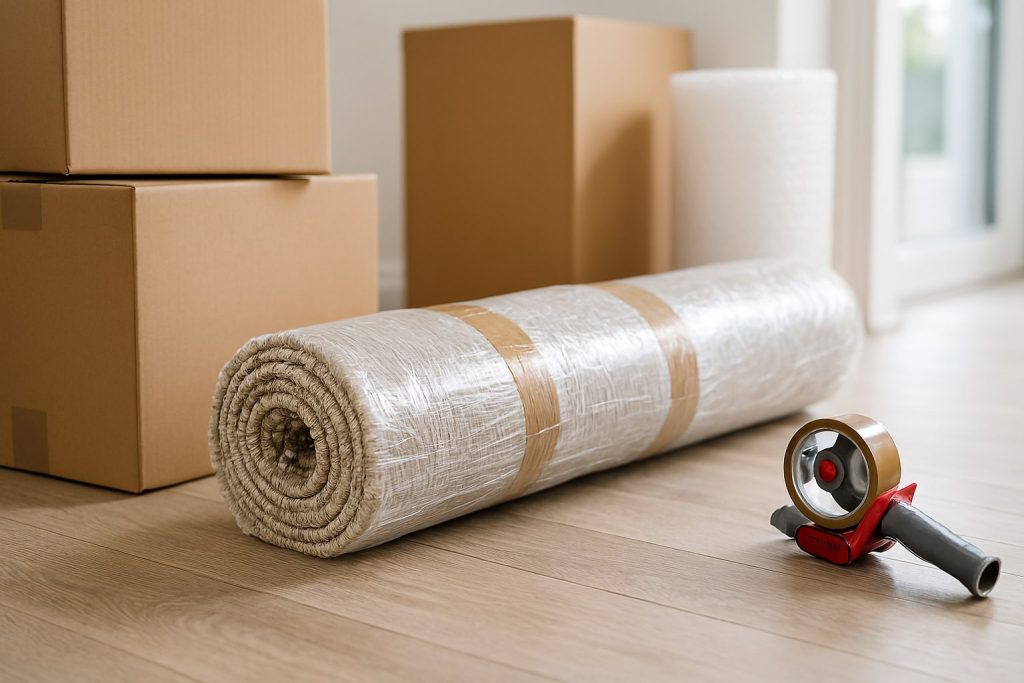
Step 4: Wrap it for Ultimate Protection
Now it’s time to protect your clean, rolled rug from the dirt and grime of the move.
- Lay your plastic sheeting on the floor.
- Place the rolled rug on one end of the plastic.
- Roll the rug up in the plastic, just like you’re wrapping a present. Ensure there’s a generous overlap of plastic.
- Tuck the excess plastic into the hollow ends of the roll, or fold it over and tape it securely.
- Use packing tape to seal the seam along the length of the rug and around the ends. The goal is to create a completely sealed, water-resistant package.
Step 5: Label It!
Use your permanent marker to label the wrapped rug with the room it belongs to (e.g., “LOUNGE ROOM RUG,” “MAIN BEDROOM RUG”). This will save your back and make unpacking much easier for you and your removalists.
Moving and Storing Your Packed Rug
- In the Truck: Lay the rug flat on a clean surface, either on the floor of the truck or on top of a flat tier of sturdy boxes. Avoid standing it on its end, as it could get crushed or fall over. Don’t place heavy items with sharp corners on top of it.
- In Storage: If you’re storing the rug, always lay it flat. Storing a rug on its end for a long period can cause it to lose its shape.
Frequently Asked Questions
Can I just fold my rug for a short move across town?
Even for a short move, folding is a bad idea. The weight of the rug and any items placed on top of it can set creases in the backing very quickly. Always roll.
What’s the best plastic to wrap a rug in?
Heavy-duty plastic is best. A great hack is to use a plastic mattress protector bag (you can get them for single or queen beds). They are thick, durable, and the perfect shape for sliding a rolled rug into.
How do I move a very large or heavy rug?
For huge or heavy rugs (like a dense wool rug), you’ll definitely need two people to roll and lift it. Once it’s rolled and secured, you can use a furniture dolly or trolley to move it easily to the truck.
How do I get creases out of a rug if it was packed incorrectly?
If you’ve received a rug that was folded, you can try a few things. First, try “reverse rolling” it (rolling it the opposite way it was creased) and leaving it for a day. You can also lay it flat in the sun for a few hours, as the warmth can help the fibres relax. For stubborn creases, a garment steamer (held a few inches away from the rug) can also help.